On My Mind: PP Workshop Recap

July’s Paper Pumpkin kit, On My Mind, was designed to coordinate with three suites from the Stampin’ Up Annual Catalog: Woven Threads, Garden Lane, and Come Sail Away. If I were going to buy one of these product suites, it would have been Come Sail Away. (I opted for Noble Peacock and Magnolia Lane instead.) Since I didn’t buy any of the coordinating stamp sets, I liked having the opportunity to work with the suites without buying them.

The kit included a Pretty Peacock ink spot and this stamp set and the supplies to make the cards pictured below it:

07.19_TOOLKIT_STAMPARTWORK

07.19_PP_FACEBOOK

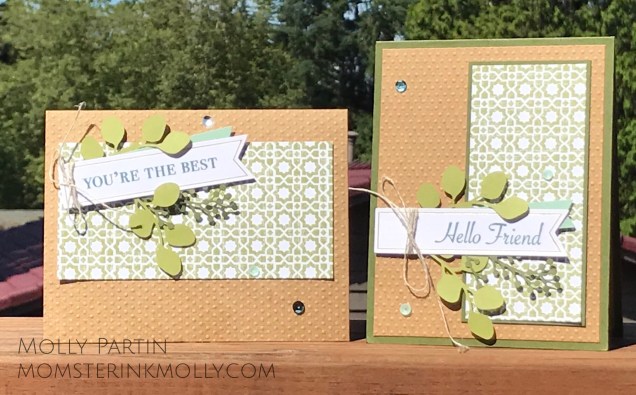
Here are the cards we made at my workshop:

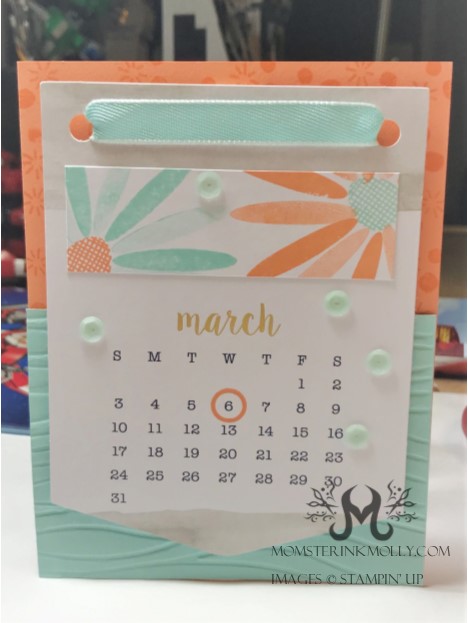
This card uses the supplies from the kit in an alternate way. One go-to method of getting more out of Paper Pumpkin kits is to cut open the envelopes and use the patterned lining as decorative paper, which is what I did with this card. The card contains elements of each product suite. The white card base is the only supply that was not included in the Paper Pumpkin kit.

final-8

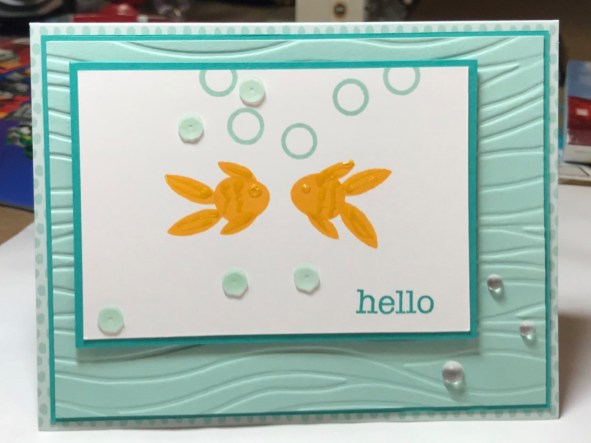
I stamped this next card with the new silver Delicata ink that appears in the Holiday Catalog, which will go live on September 4th. Sometimes with metallic inks, I feel the need the to clear emboss them to give them  more dimension. I didn’t feel that with this ink. It has great shine and texture. As with most craft inks, the Delicata takes extra time to dry. However, it seemed not to take as long as other brands of ink I’ve used in the past and it was nice not to do the extra embossing. This card is a heavily influenced by a card by Bente Snow (whose website is currently under construction).

final-7

Supplies:
Cardstock: Smokey Slate (?), Petal Pink, Very Vanilla
Ink: Silver Delicata
Accessories: Petal Pink Organdy Striped Ribbon, Banner Triple Punch

In addition to making alternate versions of cards at my workshop, we made “spruced up” versions of the cards in the kit. The only extra supplies I used when designing these cards were various colors of cardstock. In the pictures below, the Stampin’ Up version of the card is on the left and my version is on the right.

Garden Lane cards:
I really try to keep track of where I get inspiration from so I can give credit where credit is due, but I can’t remember if this card was copied from someone else, or if it’s an amalgamation of ideas from several different cards. If it looks familiar, let me know who did it first so I can share their name. For this card, I used Mellow Moss cardstock.
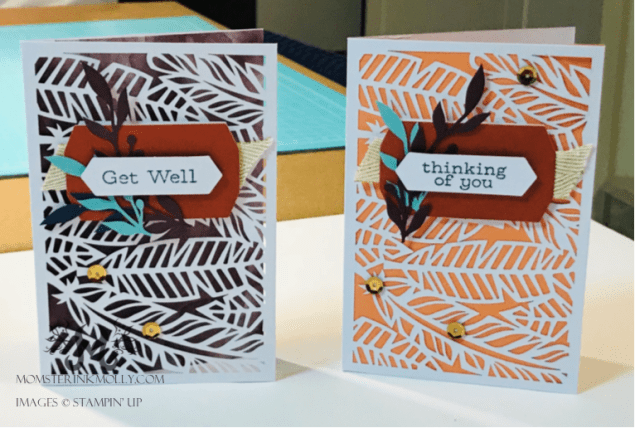
final-10

Woven Threads:
Out of all the cards in this kit, this one was my least favorite. However, some ladies at the workshop who are also quilters  really loved it. I used Seaside Spray and Terra Cotta Tile cardstock on this one.
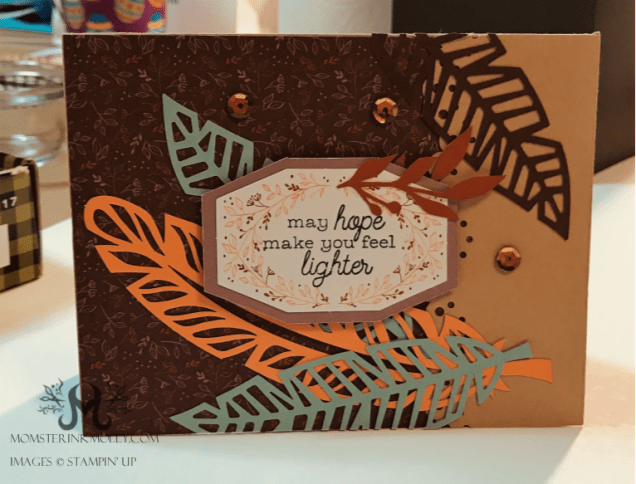
final-11

Sailing home:
I changed the orientation of this card from portrait to landscape. The only other element I added was the strip of Night of Navy Cardstock.

final-9

My next Paper Pumpkin workshop is at 7:00 pm on Friday, September 13th. You can here RSVP on meetup.com.


Hugs from Shelli–Who’s Shelli?

I made these cards from Stampin’ Up’s paper-crafting subscription kit, Paper Pumpkin. The May 2019 kit is called Hugs from Shelli. Shelli Gardner is the co-founder and former CEO of Stampin’ Up. (Her daughter Sara Douglas took over as CEO a few years ago.) She’s a pretty big deal in the paper crafting world and although she doesn’t run the company anymore, she’s still very much involved with it. The May kit is inspired by her. Anyway, I like the birds. Birds are cool.

The cards in the kit are non-standard size, and since I like to mail bigger cards, I had no qualms dismantling the pretty envelopes and using them on my cards.

file-6

First of all, let me say that I love the new In-Color Pretty Peacock. I foresee myself buying several packages of it over the next few years. When I started creating alternate cards, I picked that color first. For this first card, I featured the front of one of the envelopes. I really liked the silver border on the tags from the kit and wanted to incorporate the silver somewhere on the card. I stamped the birds in Versamark on the card base and front and embossed them with silver embossing powder. (I wished I had detail embossing powder to use, because that would have made the images more precise, but that’s a small thing.)

Supplies
Stamps: Hugs from Shelli May 2019 Paper Pumpkin
Cardstock: Pretty Peacock, Early Espresso, envelope front
Ink: Early Espresso, Versamark
Embellishments: Metal bird trinket, twine, flower punch out from kit
Other items: Silver embossing powder, Dimensionals

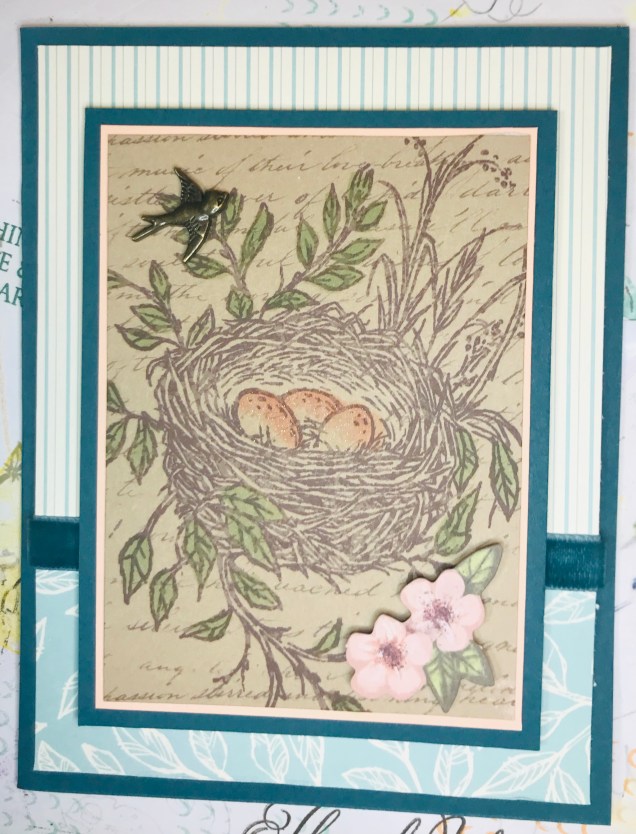
On the second card, I used the inner part of the kit’s envelopes as DSP. I used the card front with the nest as a focal point. I colored in the eggs and leaves to draw the eye to the nest itself. You probably can’t see it in the picture, but I brushed a little Wink of Stella across the tops of the eggs to make them sparkle. Aside from the sentiment on the inside, this card didn’t require any stamping.

Supplies
Stamps: Hugs from Shelli May 2019 Paper Pumpkin
Cardstock: Pretty Peacock, Petal Pink, inner envelope paper
Ink: Early Espresso
Embellishments: Metal bird trinket, Pretty Peacock velvet ribbon, flower punchout from kit
Other items: Dimensionals, markers


Snip ‘n Stamp

20190117_221305642_iosBefore the dawn of die-cut rubber and photopolymer stamps, we Stampin’ Up customers had to cut out our own stamps. They arrived on a sheet of rubber attached to foam mount. We used special scissors with tiny points and giant handles to snip out our stamps and then mount them to wood blocks. People sometimes altered the stamps–cutting a sentiment from one stamp and mounting it on a spare wood block. Luckily, we don’t have to snip our own stamps anymore, which is why I forgot about manually trimming until a few people on the PAPER PUMPKIN FANCLUB Facebook page brought up how they used an Xacto-knife to separate some of the shapes from the December kit, Day by Day, to make the stamp set more versatile. This was a fabulous idea. While some people divided their stamps more thoroughly, I only separated this one:

inked12.18_pp_stampartwork_li

The picture looks like a badly drawn emoji, but I ended up with three sizes of ovals. I used to make some of my favorite cards.

My first card is inspired by a card by Rachael White (a woman I have never met) which she posted on Facebook. (Seriously, if you want to see oodles of creative alternate Paper Pumpkin projects, visit the PAPER PUMPKIN FAN CLUB page on Facebook.) My card is basically the same as hers, except I foam-rolled the doily with Pool Party ink and added a bunny brad. (I have an overabundance of shaped-brads from the days when they were trendy).


dec18card3


Next, I made this birthday card using one of the calendar pages from the kit. Since I rarely look at a calendar that isn’t on my phone or computer, the prescribed calendar project wasn’t practical for me. I saw multiple versions of this card out there, using the circle stamp to indicate the birthdate of the recipient. Again, I used the three ovals I snipped apart from the stamp set to create the flowers at the top of the calendar page. I created the background pattern at the top of the card base by stamping Grapefruit Grove ink on Grapefruit Grove paper. I ran the bottom piece through the Seaside Textured Impressions embossing folder.

dec18card1

Finally, I had a little fun of my own and made these two little fish. I used gold Irresistible Pico Embellisher (which isn’t a Stampin’ Up product, but is still really cool to have) to give the fish some texture and dimension. I think he’s pretty cute.

dec18card2

Card recipes

Bunny
Stamps and ribbon from December 2018 Paper Pumpkin kit
Paper: Thick Whisper White, Early Espresso, Wood Textures DSP
Ink: Grapefruit Grove, Granny Apple Green, Pool Party
Other accessories: Bunny brad, Pearlized Doily, Pool Party sequins, Dimensionals, Rectangle Stitched Framelets

Calendar
Stamps, ribbon, and calendar page from December 2018 Paper Pumpkin kit
Paper: Grapefruit Grove, Pool Party
Ink: Grapefruit Grove, Pool Party
Other accessories: Pool Party sequins, Dimensionals

Fishes
Stamps from December 2018 Paper Pumpkin kit
Paper: Bermuda Bay, Pool Party, Whisper White
Ink: Mango Melody, Pool Party, Bermuda Bay
Other accessories: Pool Party sequins, Seaside Textured Impressions embossing folder, Frosted Epoxy Droplets, Gold Irresistible Pico Embellisher, Dimensionals


Ruffling Feathers

Let’s get straight to it. Here’s my take on October’s Paper Pumpkin, Friends of a Feather. Knowing the color scheme ahead of time, I wasn’t jazzed about it. Cajun Craze, Coastal Cabana, Crumb Cake, Fresh Fig, Grapefruit Grove, and Night of Navy seemed like an odd combination of a long list of colors. It’s still unlikely that I would use all these colors on the same card, but I will say that Stampin’ Up delivered a very satisfying kit nonetheless. The colors are successfully combined, but not all at once. The kit included oodles of extra punched-out feathers and leaves in varying colors and sizes. I could pick and choose which colors I wanted on the card instead of using them all at once. I absolutely loved the feather theme.

If you assemble the kit according to the instructions, you’ll end up with the eight cards pictured below–four of one kind and four of the other.

10.18_PP_FACEBOOK

I’ve created two alternatives to share with you today. Except for 1/2 sheet of Crumb Cake cardstock to use as a card base, these cards are made exclusively with reengineered kit contents.

If you don’t mind deconstructing the envelopes, they can be used as an additional source of solid-color paper. My first card is a simple variation of the card with white feather cutouts layered in front of the Fresh Fig  background.  I removed the purple section of the card and replaced it with a section of the Grapefruit Grove envelope.

oct_2018_alternate_3

Here’s my card side by side with the original. I think it makes the card feel livelier.

oct_2018_alternate_2

If the envelopes happen to have a patterned lining, as these ones do, you can splay open the envelope and use it as decorative paper.

oct_2018_alternate_5

In addition to decorating the card front with the lining of the purple envelope, I used the rest of it to make a matt for the tag that resembles a squished octagon. Here’s how I did it.

First, I traced the tag onto the envelope.

Tag Instruction-1

I used a ruler to draw another line away from the original. I didn’t do any intricate measurements, I just lined up the hash marks on the ruler with the lines on the tag.

Tag Instruction-2

I repeated this step on all sides of the traced tag.

Tag Instruction-3

I cut along the outer lines.

Tag Instruction-4

I flipped the paper over to hide the pencil lines.

Tag Instruction-5

Finally, I matted the original tag on it, embellished it, and applied it to my card.

oct_2018_alternate_5

You may have noticed that I didn’t use the gold metallic baker’s twine very much. I am awful at tying bows, and this particular twine kept twisting up or unraveling, so I decided not to use it. I’m sure those of you with more dexterity than I have could further spruce up these cards using the twine. Overall, I’m pleased with this kit.

Holiday Wreath Mini Pizza Box

I received very positive feedback on the Paper Pumpkin Fan Club Facebook page when I posted a picture of the mini pizza treat box I made using the bat stamps from the Frights & Delights kit.

Picture4

For anyone wanting to make one of their own, here’s the official “recipe.”

  • Cut one 3 3/8″ x 3 3/8″ square and four strips of 7/8″ x 3 3/8″ plaid paper from the Under the Mistletoe DSP pack. Using your adhesive of choice (personally, I’m a double-sided tape woman), affix to sides and top of a mini pizza box.
  • Use a template or drafting compass to lightly pencil a circle on a 4″ x 4″ scrap of Whisper White cardstock.
  • Stamp around the circle using the bat stamp and Old Olive ink. Use the other bat stamp and stamp around the circle in the opposite direction. Stamp stars in Mango Melody ink in random locations outside and inside the wreath. Stamp the “Treats for you” sentiment in the center of the wreath in Real Red ink.
  • Die cut around the wreath using the largest circle from the Stitched Shapes Framelits set. Adhere the circle to the top center of the mini pizza box.
  • Tie a bow small bow with red ribbon and use a mini glue dot to adhere it near the bottom of the wreath. (I don’t have an any “official” Stampin’ Up Real Red ribbon, so I used some red organdy ribbon that I had in a box of random embellishment scraps. Stampin’ Up sells Real Red ribbon that will coordinate perfectly with the paper and ink.)

If you’re not keen on purchasing all the supplies to make this little project, contact me about scheduling a workshop or one-on-one paper-crafting session.