October 2020 Paper Pumpkin: Joy to the World

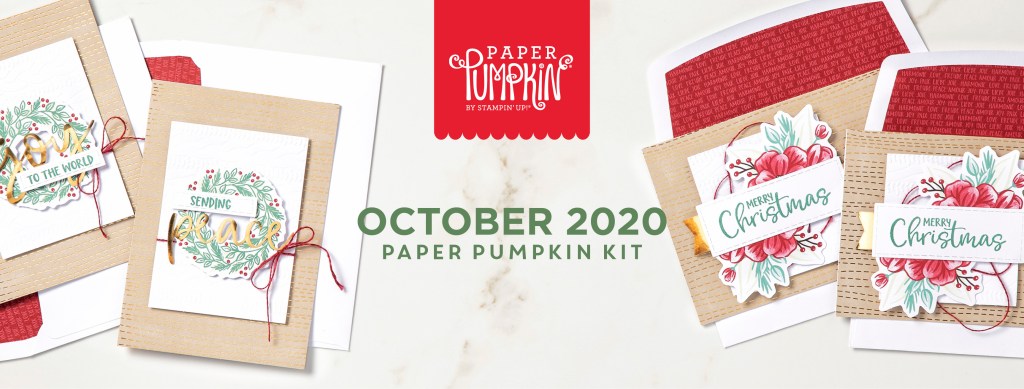
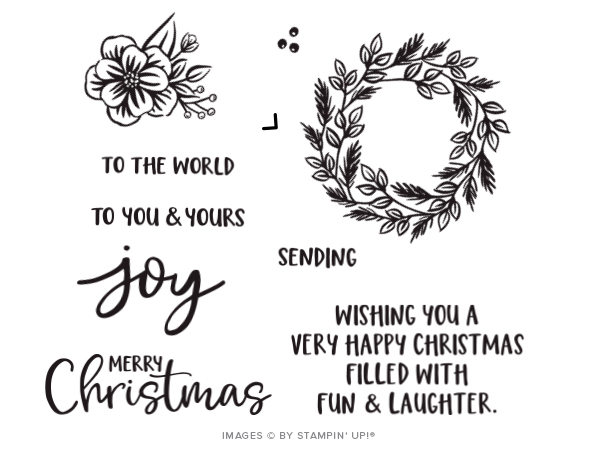
Most years, Stampin’ Up reserves the October and November Paper Pumpkin kits for the Christmas Holidays. The October kit is usually cards and the November kit usually has something to do with gift giving. Next month’s kit will make gift card holders, but if you don’t need gift card holders, I’ll feature oodles of alternate projects here on my blog. The October 2020 Paper Pumpkin kit, Joy to the World, includes all the supplies required to make a total of eight cards, four of each design, pictured above, a Just Jade mini ink pad, and the photopolymer stamp set pictured below.

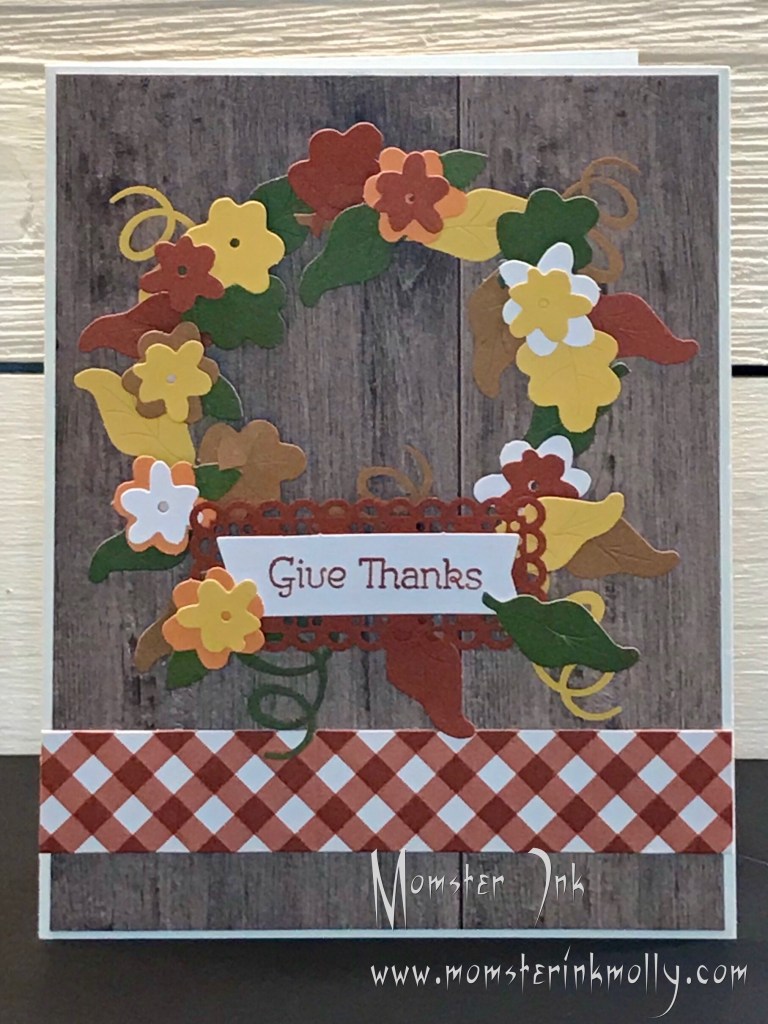
This month, I made a lot of alternate card designs that for the most part reworked the contents of the kit without many additional supplies. I cannot gush enough about how much I love the color Cherry Cobbler and it pairs well with the Just Jade leaves on the wreath and flowers. I wouldn’t have thought to include gold accents, but they look lovely against the Crumb Cake background.

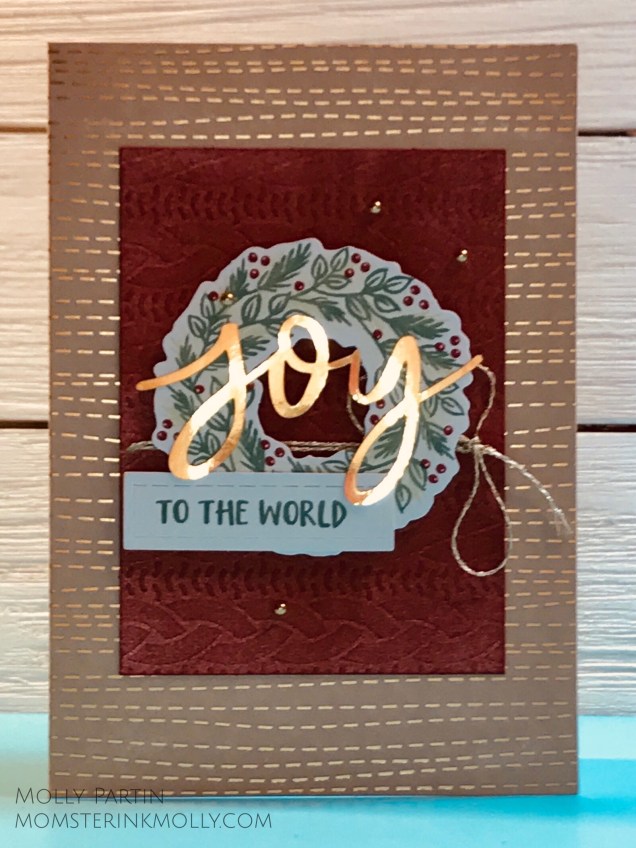
Here are my alternate designs:

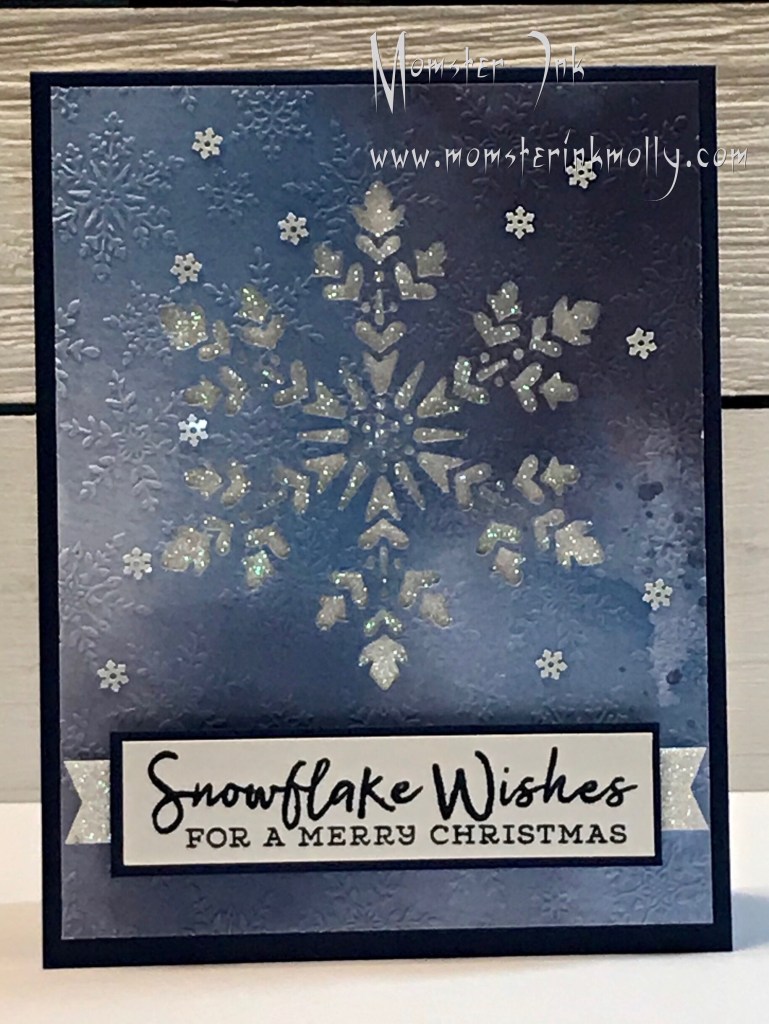
I always say don’t be afraid to sacrifice an envelope for the greater good of your card design. The envelope liner made a great background paper. On the original card design, the majority of the roses are hidden behind the tag, so I reworked the placement so you can see them better. Since Cherry Cobbler was the dominant color, I switched out the red thread for some gold I had leftover from a past Paper Pumpkin kit.

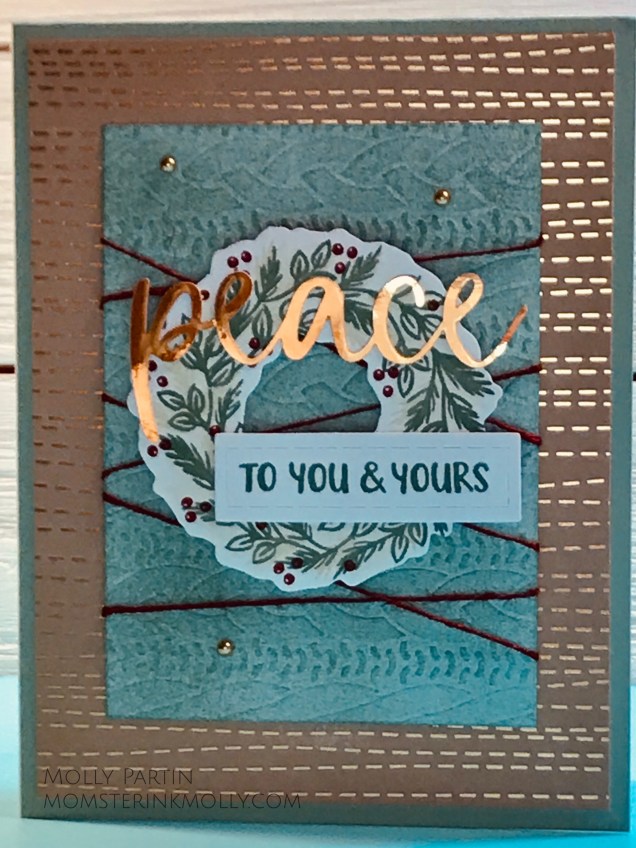
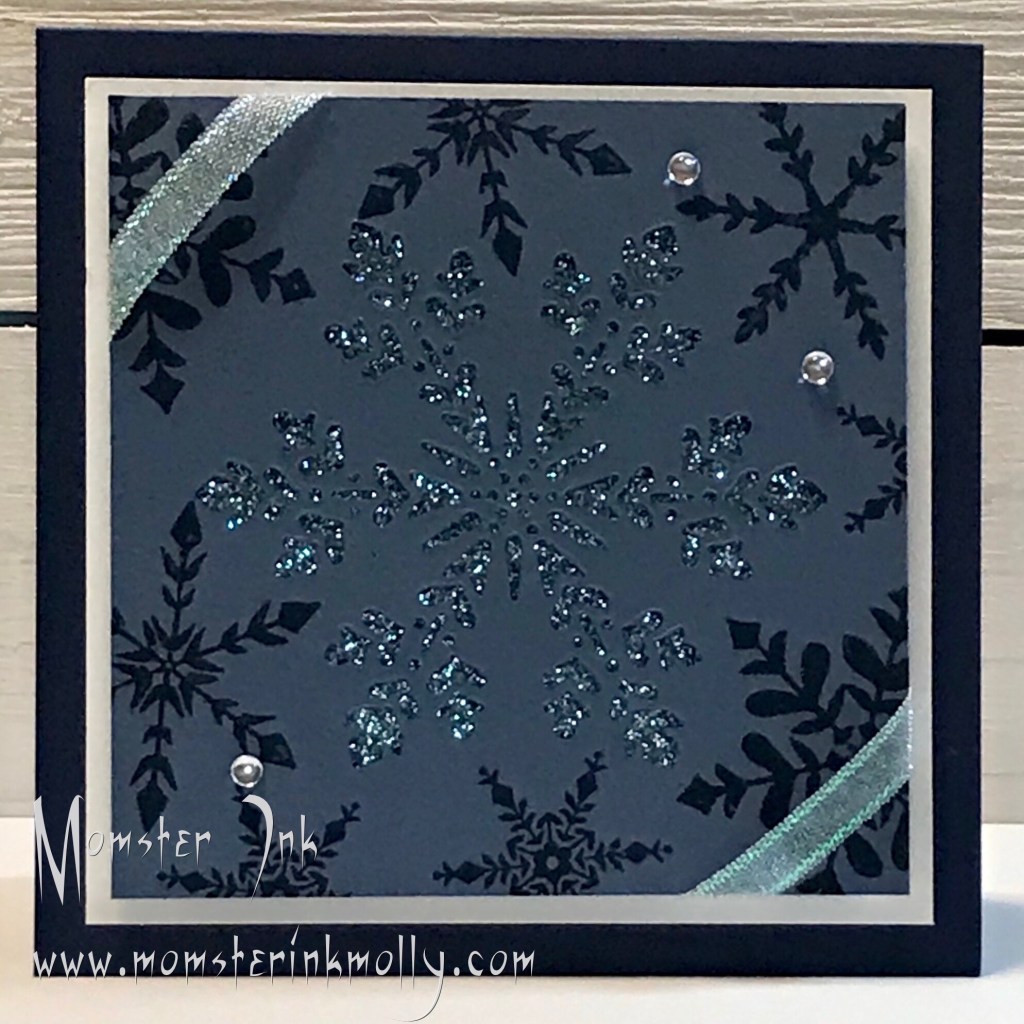
On this card, I cut down the front of one of the card bases and mounted it on a piece of Whisper White cardstock. I also sponge-rolled Cherry Cobbler ink on the cable-knit sweater embossed swatch of paper. Sponging on a different color of ink made the embossed pattern more prominent. Once again, I used gold thread instead of Cherry Cobbler.

Once again, I sponge-rolled the white embossed paper with Cherry Cobbler ink. I also added gold metallic pearls.

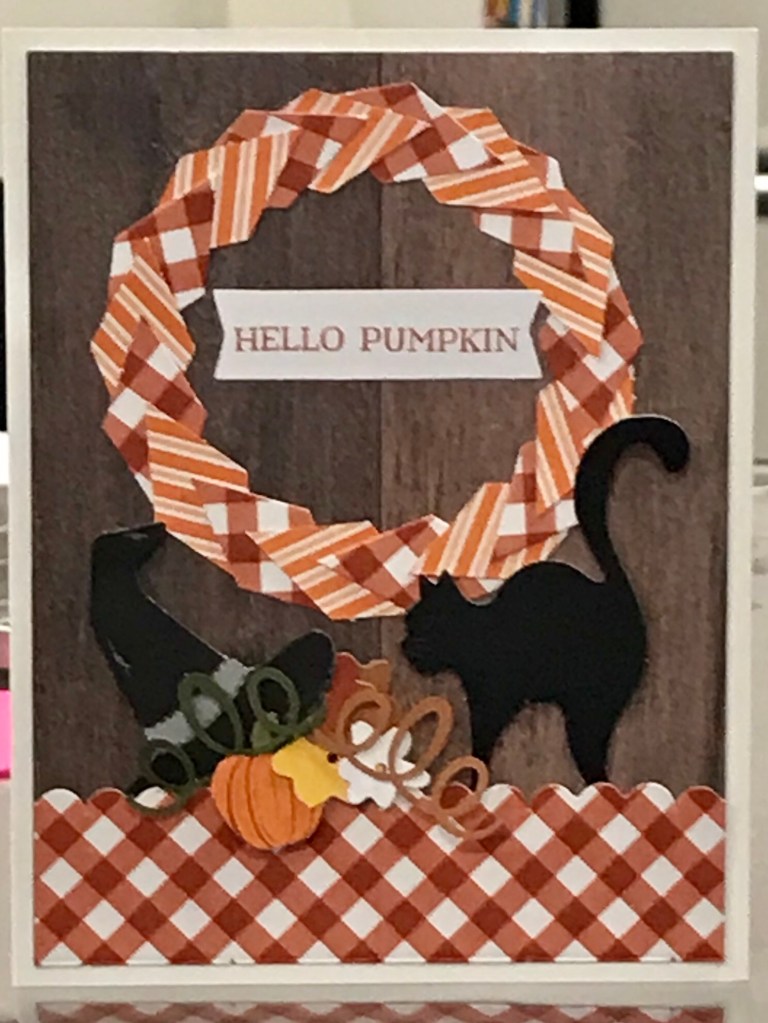
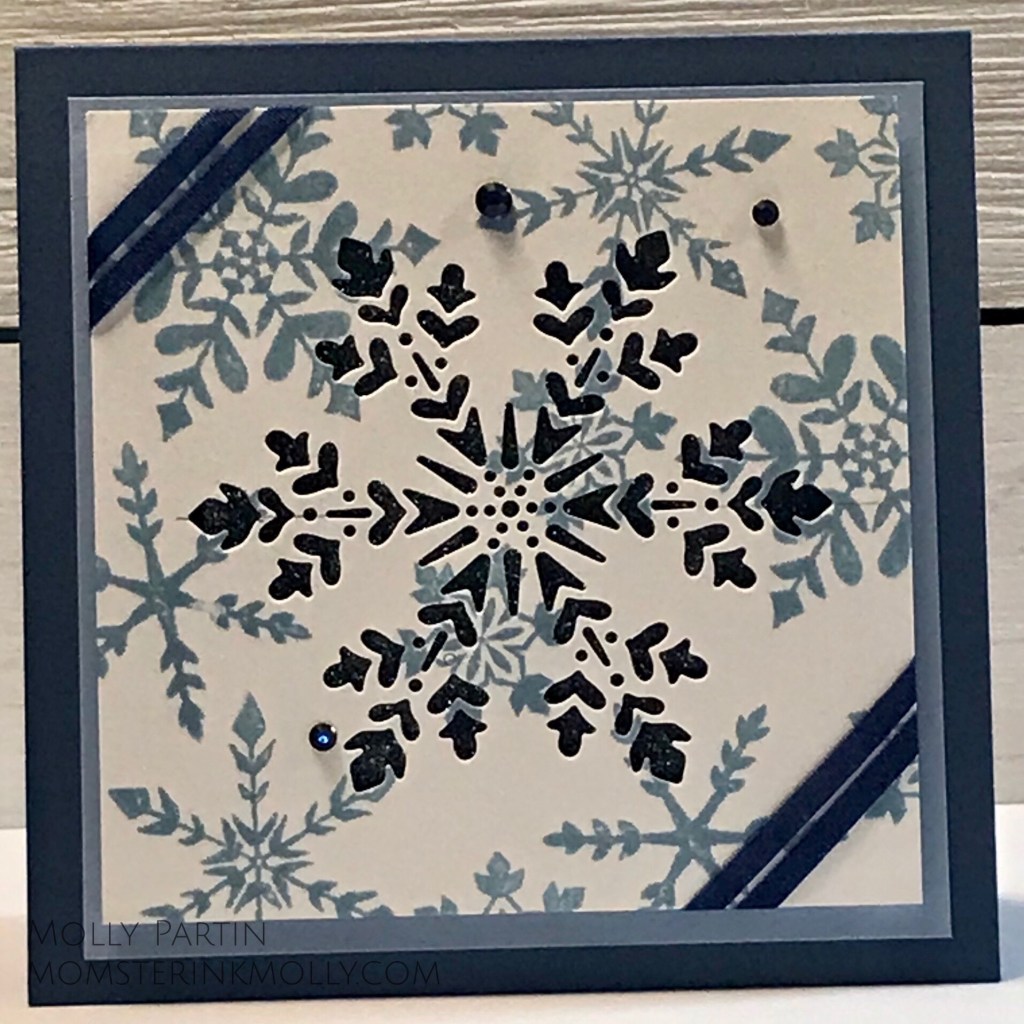
Can you tell I really liked sponge-rolling the cable-knit sweater pieces? This time I used Just Jade instead of Cherry Cobbler. I cut down the Crumb Cake card base and mounted it on a Just Jade card base. If you’ve ever made cards with me, you know that tying bows is not high on my list of paper-crafting skills. I wrapped the embossed paper with the Cherry Cobbler thread instead. I also added gold metallic pearls.

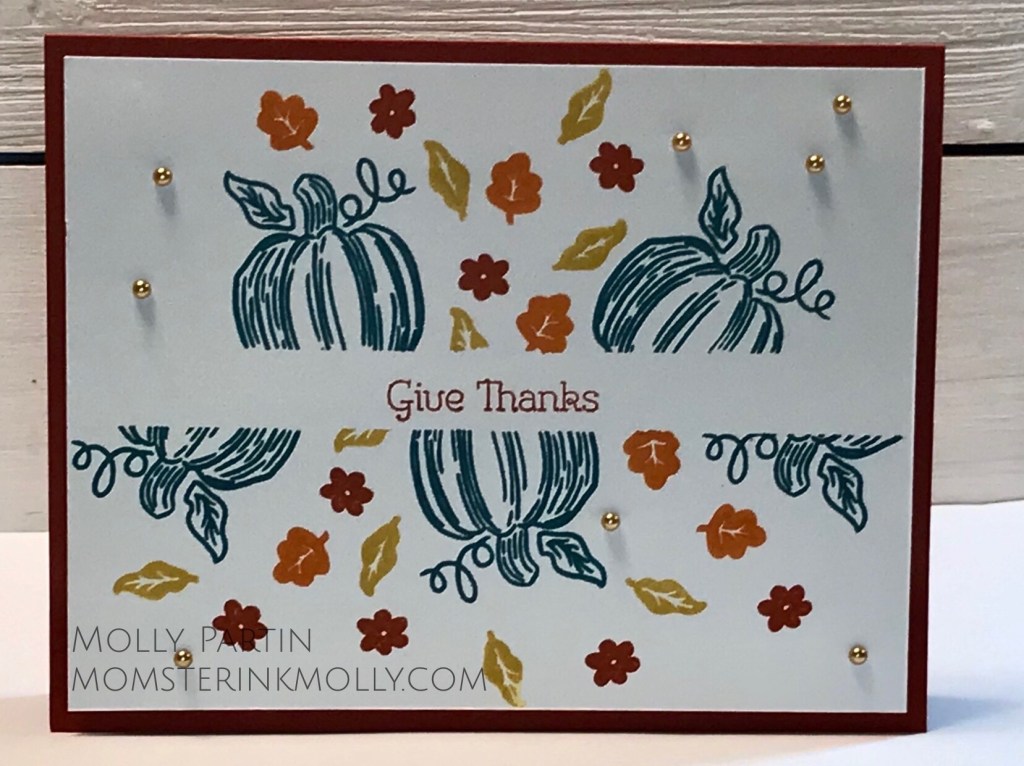
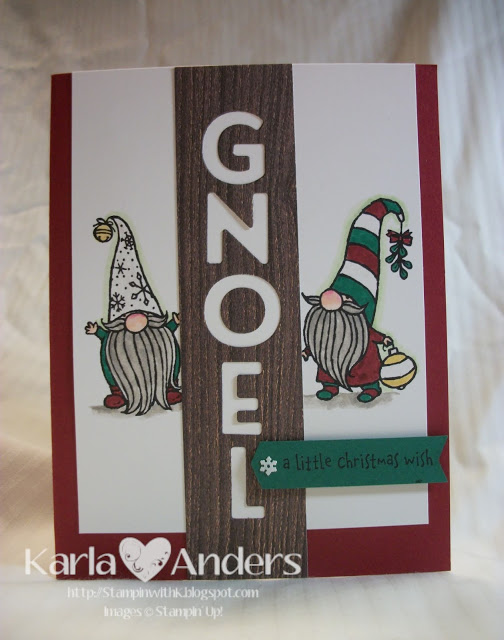
My final card is my stamps only card. It doesn’t use any other supplies from the kit. I saw a lot of people using their Stamparatus to evenly space a column using the Joy stamp and I had to do it too. This card is a short slimline card and fits in a small letter envelope.

Additional Project Supplies

As I mentioned earlier, next month’s kit will make gift card holders. Here’s a little sneak peak of what to expect. The kit will contain fifteen gift card carriers with coordinating envelopes. Featured colors are Cinnamon Cider, Daffodil Delight, Calypso Coral, Mint Macaron, Shaded Spruce, Blushing Bride, and Whisper White.

Sucker for Snowflakes: Blues Edition

That’s right, I’m a sucker for a good snowflake stamp set. Every year, I tell myself not to buy another one because I have so many. Then I go and get another one anyway. I’ve already vowed to have more control next year, but this year, I couldn’t resist Stampin’ Up’s Snowflake Splendor Product Suite. The suite consists of:

Product List

One of my favorite things from this suite is the Winter Snow embossing folder. Not only does it work well with the other products in this suite, it elevates any other holiday card/project you might be designing.

I also love the “reverse” dies from the So Many Snowflakes set, and I’m featuring one of them in today’s post.

Sometimes when I design cards, I get hooked on one color. For this series of cards the color was Night of Navy.

This is the first card I made:

I embossed a piece of the blue watercolor-looking paper from the Snowflake Splendor designer series paper pack with the Winter Snow embossing folder. I just love the texture it provides! I used white glitter paper from my stash of retired products and placed it behind the snowflake cutout. The card was fairly simple and very satisfying to make.

My next two cards are meant to be opposites of one another. The insides of the cards use the “Thank You Snow Much” sentiment from Snowflake Wishes stamp set. We always think about sending cards before the holidays begin, which isn’t a bad thing per say. These cards however, are perfect thank you cards for the gifts and acts of kindness you receive over the holidays.

Side note: I used to leave the insides of my cards blank so that I could stamp a sentiment tailored to the recipient. However, I seem to pick cards for people at the last minute (I mean heading out the door kind of last minute) and never have the time to dig out an appropriate stamp for the interior of the card. Now, I stamp the sentiment beforehand, and if you’re the last-minute card selector that I am, I encourage you to do the same. I’ve made so many cards that I now seem to have one for most occasions and if I want to make the card truly personal, I can always handwrite it.

Additional supplies:


Purchase either the Snowflake Splendor Suite or the Snowflake Wishes Bundle (the stamp set and the dies) and I’ll send you a PDF tutorial on how to make the three cards in this blog post.

Happy Stamping! (That sounds cheesy, I know, but I’m going with it.)

What’s in my On-the-Go Craft Tool Box?

I’ve just spent the last three days at the Inky Fingers Crafting Weekend retreat. My 16 year-old daughter came with me and we loaded up the back of my Forester with all manner of paper-crafting supplies. When I say loaded up, what I’m really saying is stuffed to the brim. We had to get a baggage cart to bring it all in to the hotel.

Not all crafting events require a trunkful of supplies though. That’s why I’ve created my own On-the-go Tool Box that packs tightly into one of Stampin’ Up’s wide stamp storage cases to use when I attend smaller workshops where most everything else is supplied.

Here’s a picture of what is stored in my tool box:

  1. Acrylic stamp block
    I prefer Stampin’ Up’s Clear Block D. It measures 2-7/8″ x 2-11/16″ and doesn’t take up a lot of room in the case. I’ve found that it fits most stamps I use. I also love how the block is grooved on the sides for easy gripping.
  2. Double-sided Tape
    Most people prefer a certain type of adhesive: glue, tape runner, glue dots. Some people love tape runners and are very adept at using them. Tape runners will also fit perfectly in your tool box. I, however, use double-sided Scotch tape, mainly because I’m about as coordinated at using a tape runner as I am at tying a bow (you won’t see a lot of bows on the cards I design). Stampin’ Up recently introduced two new tape runners, Stamp ‘n Seal and Stamp ‘n Seal+. I’ve used these a few times now with success, meaning that I didn’t end up with sticky fingers and a roll of unwound tape that I can’t roll back into the applicator. I have to use up my supply of Scotch tape before I fully commit to them though.
  3. Glue Dots
    Glue dots are great for sticking down tiny things. Paper Pumpkin kits come with more than enough glue dots to finish the projects you make so I have oodles of sheets of them. You can also order a roll of glue dots from Stampin’ Up or find other versions at your local craft store.
  4. Stampin’ Dimensionals and Mini Stampin’ Dimensionals, also known as “foam popper upper thingies”
    The purpose of Dimensionals is to do exactly what is in the name. They give your projects dimension by lifting elements off the card base. You can also find adhesive foam squares at your local craft store.
  5. Paper Scissor Snips
    The purpose of scissor snips it to precisely cut out small things. Mine are Cutterbees, but Stampin’ Up also sells a nice pair.
  6. Bone Folder
    Bone folders smooth down the creases in your cards; allowing them to lie flatter. In my experience, most bone folders are created equal. You can buy a a bone folder from Stampin’ Up and most local craft stores also sell them.
  7. Pen & Sharp Pencil
  8. Take Your Pick tool
    The Take Your Pick tool is a paper-crafter’s dream multi-tool. One end has tacky putty end that easily picks up sequins, paper accents, and other small objects. The other end has 2 changeable, double-ended tips; one with a with paper piercer and mini spatula and the other with small stylus, and large stylus.
  9. Water color painting pen
    A water color painting pen holds water for easy water color painting. Most of the time when I’m at a workshop where water coloring is required the host usually provides one of these. It is however nice to have your own so you don’t have to wait your turn to use the one provided. Stampin’ Up sells a set of three of these babies with varying brush thicknesses.
  10. Tweezers!
    I love these reverse-action tweezers that I found on Amazon! Once you grab something, they hold on to the item even when you stop squeezing.

Chillin’ with my Gnomies

The Gnome for the Holidays stamp set from Stampin’ Up’s August–December 2020 Mini Catalog was a must have for me. I mean who doesn’t love a good gnome pun? Well, probably people who don’t like gnomes or people who don’t like puns, but I’m going to pretend that those people don’t exist and share my excitement about this set.

I found so many fabulous examples of cards made with this set on Pinterest and Stampin’ Up groups on Facebook. I CASEd many of them and still haven’t started designing my own. If you click the right arrow on the pictures of my cards, you can see the cards that inspired my designs.

First, I’m going to share a card inspired by this card made by Karla Anders. Her card uses traditional Christmas colors but I decided to jazz mine up by using the color scheme from the Snowflake Splendor product suite in Stampin’ Up’s August–December 2020 Mini Catalog.

Some day I’ll figure out how to photograph glitter paper well, but for now we’re stuck with this. Here’s my card:

My next card is inspired by one made by Garry-Pauline McArdle, a Stampin’ Up demonstrator from New Zealand. I switched up the design by using elements from the Snowflake Splendor product suite.

My final card was inspired by this card from Christy Gridley.

I brightened up the card by using Pacific Point paper. I didn’t have the pretty flocked vellum that Christy did, so I made due with plain vellum and a retired embossing folder called Scattered Sequins.

Product List

September 2020 Paper Pumpkin: Hello Pumpkin

Some people just aren’t into Halloween and every September Stampin’ Up puts out a Halloween Paper Pumpkin kit that usually contains bags or boxes of some kind. This kind of kit is useful to a lot of people. It’s useful to me, but I know of plenty of stampers who don’t participate in Halloween for one reason or another and have no need of a Halloween-themed stamp set. I think that his year, Stampin’ Up released a well-balanced kit that is useful to Halloween and non-Halloween participants alike.

The Hello Pumpkin kit contains ample supplies to create and decorate twenty of the cracker boxes pictured above. The great thing about the boxes is that they’re double-sided, white and Pumpkin Pie striped for Halloween and a Cajun Craze gingham pattern for an autumnal feel. It also includes a Cajun Craze Stampin’ Spot and the stamp set pictured below:

What’s great about this stamp set is that the images can be adjusted from a general fall season look to Halloween with the simple addition of the Jack-o-Lantern faces.

The cracker boxes are super cute, but this blog post is all about showcasing alternative ideas, which is what we do at my monthly Paper Pumpkin workshop. My regular attendees weren’t keen on the Halloween theme, so I stuck with the autumnal concept. I found a plethora of ideas on the internet and many of them incorporated wreaths, so that’s what I started with. I gave the ladies these two card samples to work from.

You can’t really tell from the pictures, but the flowers are popped up on Stampin’ Dimensionals, which gives the wreath two levels of depth.

Of course, my ladies took creative license and made these cards:

Liz’s card
Kathy’s card

The final card we made was CASEd from Denise Kepple Garrison over at www.ladybugstampin.com. Her card was just too cute not to replicate in its entirety.

Coming soon…

October’s Paper Pumpkin kit is called Joy to the World. It will contain supplies to make eight greeting cards (four each of two designs). The subscription period for this kit ends October 10th and kits start getting mailed out on the 15th. Subscribe now and then register for my monthly Paper Pumpkin workshop on October 24th and get alternate ideas for using the kit’s supplies.

Project supplies:

September 2020 Paper Pumpkin kit, Hello Pumpkin

Product List