…you cannot predict the wonderful ways in which you will use them in the future.
I had a blast making alternative designs with the contents of the October 2021 Paper Pumpkin kit, Peaceful Christmas. Part of the reason I enjoyed my creative time so much was because I dug out a few cutouts from past Paper Pumpkin kits that coordinated with the current kit. Before I share my cards, I’d like to show you the way I store cutout shapes, tags, and vellum from previous kits.
I store them in the same plastic pages that collectors use to store baseball cards. The pockets are a great size and they have a little flap that folds over the top of the compartment which prevents items from spilling out. The pages are fairly low in cost and I place them in a narrow binder that fits neatly on a shelf.
Here are my alternative designs for the October 2021 Paper Pumpkin Kit, Peaceful Christmas that included items from past kits.
First, I found this silver foil deer from the November 2019 kit, Winter Gifts, which had a similar color scheme as the Peaceful Christmas box. I made two cards using the (unfortunately) last two deer I had left. I gave one of the deer a red rhinestone nose and I flipped the other deer over and stamped a line of trees on it in Tuxedo Black Staz-On. I think he looks a little like he’s wearing an ugly Christmas sweater.
On this next card, I dug out some silver foil stars that were included in a kit from way back in July 2014, Wish Big. For a long time, I would occasionally come across these stars and wonder why I kept them for so long. Well, seven years later, I finally found a purpose for them and I’m so glad I saved them.
If you were wondering, on this card the silver metallic word Noel is sponged with Jet Black Staz-On and the vellum trees are sponged with Basic Gray ink to give definition to the places where the vellum and foil would have made the card too monochromatic.
Thanks for reading my post. Subscribe to my blog so you can see future Paper Pumpkin tips.
Haunts & Harvest, the September 2021 Paper Pumpkin kit by Stampin’ Up contains all the supplies to make the 12 treat boxes pictured above. These supplies even include a mini Soft Succulent ink pad (a.k.a. Stampin’ Spot) and a ten-piece clear photopolymer stamp set featuring the images pictured below.
The September kit is always tricky one to create alternate designs from because the kit always contains some version of a treat container. These first two cards are my favorites from all the alternate card designs I created. Except for the stamp set, neither of them uses any of the kit contents. They showcase possibilities for after you’ve made all those treat boxes and given them away to coworkers or your kids’ classmates.
For this card, I tried to create a simple and elegant design. The card base is Thick Very Vanilla. The next layer is a panel of regular Very Vanilla cardstock with a square cut in the top center and then embossed using the now retired Woodland embossing folder. I brushed Wink of Stella over the tree trunks to give them some subtle sparkle. For the leaf stamped at the center of the square, I sponged the center of the leaf stamp with Mango Melody ink and then used a sponge dauber with Pumpkin Pie ink to darken up the edges. The tag was created using the Lovely Labels Pick a Punch.
The next card is clean and lovely as well. The card base is Mango Melody. The leaves are stamped on squares cut from the now-retired Stitched Shapes dies in Cajun Craze, Pumpkin Pie, and Mango Melody ink using the same technique wherein you use sponge daubers to give the edges of the image a darker hue. The tag is created from Very Vanilla and Cajun Craze cardstock and the Banners Pick a Punch. I finished off the card with a few gems from the Holiday Rhinestones pack.
For the pumpkin card below, I cut out each section of the darkest orange treat boxes, trimmed them down to about 3″ high, and sponged the edges with Pumpkin Pie ink and a sponge dauber. I freehand cut the stem from a scrap of Soft Suede cardstock and sponged the edges of it with Soft Suede ink. I assembled the pumpkin, starting with the center and then each side moving backwards. I placed the jack-o-lantern face stickers from the kit on the face of the pumpkin. Next, I stamped leaves around the edge of a Very Vanilla card base (no need to stamp the middle because it gets covered by the pumpkin). The leaves are stamped in Soft Succulent and the veining down the center of them is Evening Evergreen. I stamped the sentiment on one of the tags from the kit in Soft Succulent and attached it with some leftover linen thread from a past Paper Pumpkin kit. Voila!
This next card is a variation on the card pictured above. Instead of using the darkest orange pumpkin treat box, I picked the lightest one. The leaves are from the kit and the stem is freehand cut from one of the treat box segments. The card base is Soft Succulent and the Cajun Craze panel is embossed with the Tasteful Textile 3D embossing folder. I created the strip of raffia that runs behind the pumpkin by extracting the wire from the center of one of the ties for the treat boxes. The tag is stamped in Soft Succulent and is once again attached with some linen thread leftover from a past Paper Pumpkin kit. Finally, I mounted the pumpkin on the face of the card using Dimensionals to give it…well…some dimension.
My final card is what I like to call a “One Layer Wonder.” It’s kind of the opposite of a One Sheet Wonder where you use one sheet of designer series paper to create multiple cards, but instead you just make one card that doesn’t have any layers. I used the remainder piece from the leaf punch-outs as a stencil to create a line of leaves across the bottom of a Very Vanilla card base. I used sponge daubers inked with Cajun Craze, Pumpkin Pie, and Mango Melody inks to fill in the stencil. Finally, the sentiment is stamped below the row of leaves in Early Espresso ink.
Thanks for stamping with me! If you live in the Eastside of the Seattle area, please join me at my next Paper Pumpkin workshop on Saturday, October 30th. Sign up in the Bellevue/Redmond Cardmakers group on Meetup.com. Also, check out my other cardmaking group on Meetup, Momster Ink’s Eastside Stampers & Paper Crafters for further classes.
Next month’s Paper Pumpkin kit is called Peaceful Christmas and coordinates with the Peaceful Place Suite Collection available in the July-December 2021 Mini Catalog. Subscribe by October 10th to ensure you get one.
I have mentioned before that I’m a sucker for snowflakes. I even wrote a blog post about it. Well, not only am I a sucker for snowflakes, I’m also an easy mark when it comes to butterfly stamps. So, when I saw the sneak peek for the August 2021 Paper Pumpkin with the giant butterfly on it, I was very excited.
Not only does the Hope Box contain the supplies to make all the cards pictured above, the box itself is designed to decorate and keep as a box of mementos. It reminds me of a green glass box I had when I was a tween (that was before they started calling tweens tweens). I stored things that meant something to me at the time–a handkerchief from my grandma with my name on it from my grandma, for example. Here’s a piece of advice though: write down what the items you put in you box and why they’re important to you. There are a few things in my green glass box that I am clueless about!
Back to the Paper Pumpkin…in addition to containing all of the paper and embellishments needed for the cards and supplies to decorate the box, it also includes a Blackberry Bliss Stampin’ Spot (tiny ink pad) and the stamp set pictured below.
I’m a member of a few Facebook groups full of Paper Pumpkin fans, which are great inspiration when I design the cards for my class projects. Well, this month, a Stampin’ Up demonstrator named Vy Tran over at Crafting Daily Dose made an amazing fold out card that we copied step by step at my workshop. The only product to supplement the kit contents was one sheet of Bermuda Bay cardstock.
Vy created an excellent instructional video on how to make this card, so instead of trying to tell you how to do it, I’m sending you to the source.
Vy’s card is awesome and as far as I’m concerned you don’t mess with success, which is why we followed her design exactly for my class.
To create the “stamps only” card for my workshop, I utilized the Joseph’s coat embossed masking technique.
The abridged version of instructions for the Joseph’s coat technique goes as follows:
Use sponge daubers and various colors of light or bright inks to color an entire panel of white or vanilla cardstock.
Rub paper with an Embossing buddy or a used dryer sheet to release any static on the paper.
Choose a stamp with thick lines or solid images. Detailed images do not perform well with this technique.
Stamp the image in Versamark multiple times around the paper.
Cover the paper with clear embossing powder.
Tap off powder (and put it back in the container!) and use a heating tool to melt the embossing powder.
Choose a very dark color of ink, usually black, and begin sponging over entire image. The ink will not stick to the embossed areas of the paper. Periodically, wipe with a paper towel.
Continue until you’ve reached your desired level of coverage. Wipe off remaining ink.
If my written instructions don’t do the job, here’s a quick video from another Stampin’ Up demonstrator, Niki Ridge, where you can see the technique demonstrated.
To attend my next Paper Pumpkin workshop on September 25th, sign up at Meetup.com in the Bellevue/Redmond Cardmakers group. Also, check out my meetup group Momster Ink’s Eastside Stampers for information about my other stamping workshops, Stamping 101 and Paper Playground.
Boy did I love the July 2021 Paper Pumpkin kit, The Adventure Begins! I loved the color palette and the style of the backgrounds. The kit contains all the supplies to make the cards pictured above. Along with the coordinating envelopes, the kit arrived with a Garden Green mini ink pad and the eleven piece photopolymer stamp set pictured below:
Since the cards are tri-folds, I challenged myself to use one card base and an envelope to make three different cards. I did have to add in three card bases, some paper scraps and a Flirty Flaming ink pad, but other than that, I didn’t use any additional elements.
Here are my cards:
For some reason, I just really wanted a pink tree.
I’ve always wanted a camper trailer.
My camera made a crazy halo effect when I photographed this shaker card! The Subtle Shimmer Sequins must be extra reflective.
Finally, I made a set of stamps only cards, where I don’t use any supplies from the box aside from the stamp set and the Stampin’ Spot. These cards use the stamping off technique (aka generational stamping) to achieve different gradients of colors on the trees. I scraped the edges of the white paper with scissors and sponged with them with Crumb Cake ink.
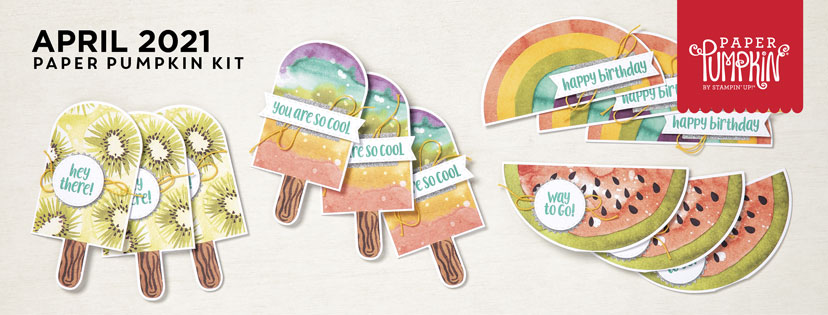
It’s July and I’m catching up on my Paper Pumpkin Workshop recaps. This kit is from April but the hot summer months are a perfect time to post about Stampin’ Up’s monthly subscription paper-crafting kit, So Cool. The kit includes all the supplies to make three each of the four card designs pictured above. It also came with additional stickers, coordinating envelopes, a Bermuda Bay mini ink pad, and the seven-piece photopolymer stamp set featuring the images pictured below.
The first thing that came to mind when I saw the sentiments on this stamp set was that if my daughter’s handwriting were made into a font, this would be the font! The youthful feel of this kit provided a perfect avenue for crafting with kids, tweens, and teens.
Since the cards themselves are shaped, I decided that I wanted to put them on backers. I used patterned paper from both the Ice Cream Corner suite featured in the January-June Occasions Catalog, and the Oh So Hombre that was available free with a $50 purchase during Sale-a-Bration. (Although the Sale-a-Bration promotion from earlier in the year is over, there’s another one starting up at the beginning of August.)
For this card, I added a black card base and reworked the supplies already in the kit.
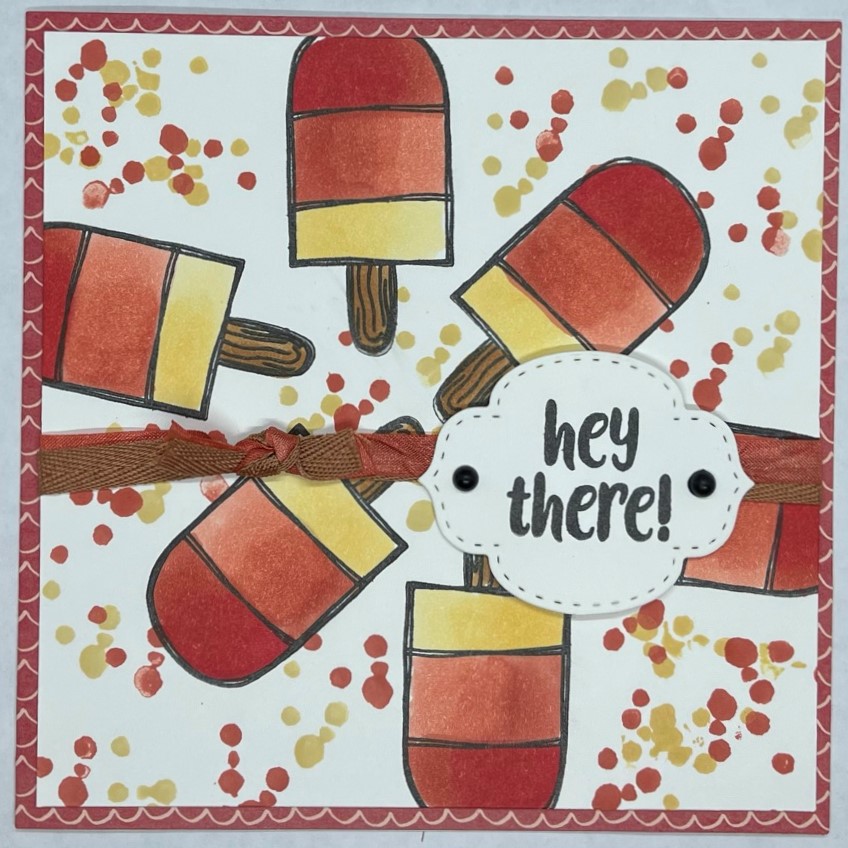
I made two “stamps only” cards. This first one is a fresh and simple one-layer card. My card is colored with alcohol ink markers by Stampin’ Up called Blends, but a person without a plethora of craft supplies, can use any other kind of marker of colored pencil.
My second card features the popsicle stamp.
If you think you might love receiving the monthly subscription-base paper-crafting kit, the Paper Pumpkin, subscribe here. If you’re interested in attending in one of my Paper Pumpkin Workshops, you can find them listed on MeetUp.com under the Bellevue/Redmond Cardmakers group.


 Specialty Paper")


")

")


 Open Weave Ribbon")