April Paper Pumpkin: My Wonderful Family

Once again, I was not able to hold my monthly Paper Pumpkin workshop, so posting my alternate card ideas descended to the bottom of my task list. The April kit was all about family.

This Paper Pumpkin box includes a stamp set, a Pear Pizzazz mini stamp pad, and the supplies to make these cards:

0420_PP_FACEBOOK

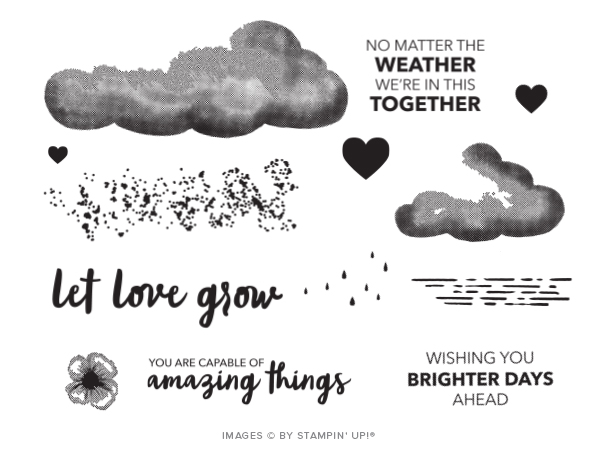
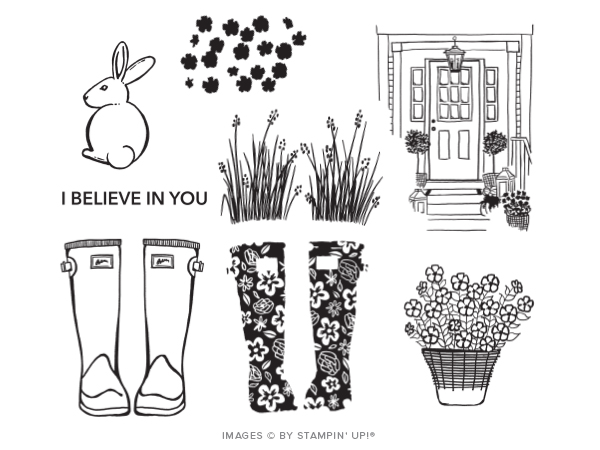
Here are the stamps included in the supplies:

0420_PP_STAMPARTWORK

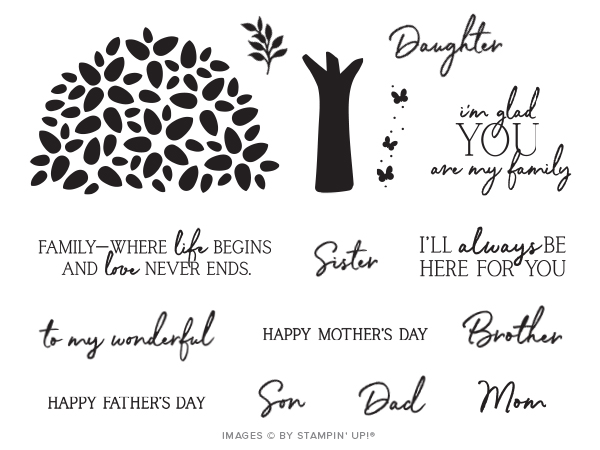
In addition to the Happy Mother’s Day and Happy Father’s Day sentiments, it also contains other phrases and words you can use to customize your creation to give to another family member. Unfortunately, one minor complaint about the collection of words is that “Step” or “In-law” weren’t included. I suppose you could mimic the script as best as possible and write those if you felt the need to.

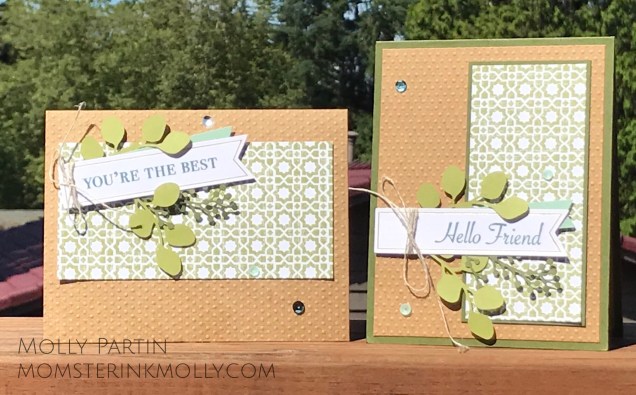
My first alternate card slightly alters the card with the branch of leaves on it so you can read the wonderful wording behind the leaves. It’s difficult to see on the picture, but it reads, “Life’s greatest blessings begin and end with family. It is in families that we learn to love, teach what is most important, and grow together in love and laughter. Grateful for you. Happy to be yours.”

final

Instead of overlaying the leaf branch atop the paragraph, I snipped up it into several pieces and placed them around the paragraph. Instead of putting the “I’ll always be here for you” sentiment on a tag on the front, I stamped it on the inside of the card.

My next card required no creativity on my part. I slightly altered an example from the leaflet included in the kit. The card in the kit featured a pink hydrangea. Where I live, hydrangeas grow blue, so it seemed wrong to have a pink one on a card. I had to make a blue one.

final-2

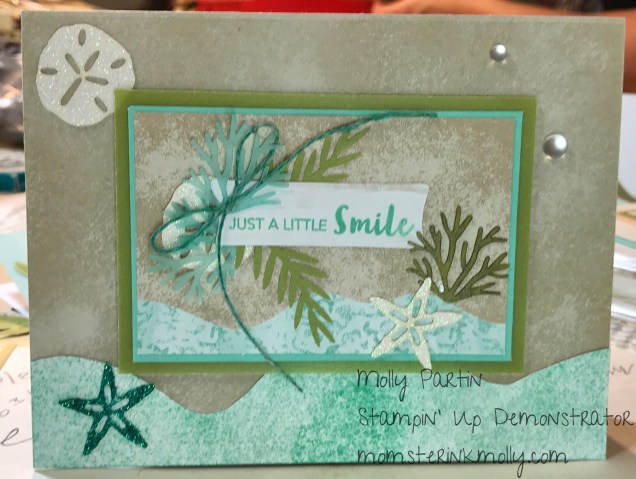
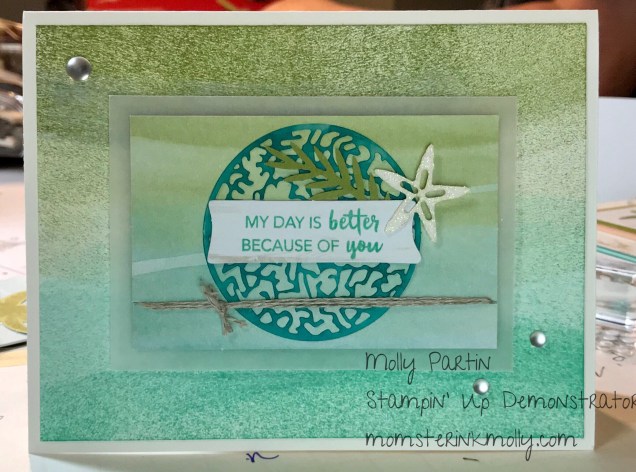
My final card is my stamps only card. This card required a heap of different ink pads. If you’re an avid stamper, you’ll probably already have them. If you’re a beginner, experiment with supplies you already own and create your own version. I used a sponge daubing technique to achieve the gradient on the tree leaves. To do this, first ink the leaf stamp with a light color ink and then use a sponge dauber to tap on some darker ink. For these trees, I used Granny Apple Green, Call Me Clover, Shaded Spruce, Crushed Curry, and Cajun Craze.

final-1

Product List

If you’re not already a Paper Pumpkin subscriber, I highly recommend subscribing. The kit is all inclusive, so even if you don’t have any other paper-crafting supplies, you’ll be able to make the projects.

March Paper Pumpkin Workshop: No class, no problem

I won’t be holding my monthly Paper Pumpkin Workshop tonight due to the COVID-19 outbreak. Instead, here are samples of the projects we would have worked on tonight. I was really looking forward to this month’s project kit since it included an extra stamp set to commemorate Paper Pumpkin’s sixth anniversary and I wasn’t disappointed. I loved the sets they sent! The stamp set included in the kit is called No Matter the Weather.

0320_PP_STAMPARTWORK

These stamps are great, but I was especially excited about the bonus stamp set, Spring Splash!

0320_PP_FREESTAMP_ARTWORK

The rain boots, a.k.a. wellies, remind me of a song my grandma sang to me when I was a little. It mentioned rain boots and bumbershoots. I guess that its kind of fitting that I grew up and moved to the Pacific Northwest, a place of excess rain and occasional sunshine that makes it all worth it.

I’m just going to jump right to one of my favorite alternatives. I sacrificed one of the envelopes with the striped Petal Pink liner to make the bottom portion of the card. Basic Gray ink on Basic Gray resulted in an ominous and looming presence, so I stamped the clouds on the top portion in Versamark to give them a watermark effect. I considered embossing the clouds with clear embossing powder, but I decided against it because it would smooth out the dimensionality of the cloud stamp.

final


Supplies:

Stamps: Spring Splash and No Matter the Weather from March 2020 Paper Pumpkin kit

Ink: Pear Pizzazz, Basic Gray, Balmy Blue, Versamark

Paper: Gray Granite

(5.5″ x 8.5″), Whisper White (3.5″ x 3.5″ plus scraps for bunny and boots), Petal Pink liner from envelope (3″ x 4″)

Accessories: Rain and Dewdrop embellishments (included in kit), Stampin’ Dimensionals, Pear Pizzazz ribbon (retired*), Stitched Shapes Dies (152323)

*Suggested alternatives for ribbon: a 3/8″ x 4.25″ strip of Pear Pizzazz paper brushed with Wink of Stella, Gray Granite Textured Weave Ribbon (147656), Petal Pink Metallic Edge Ribbon (151194), Whisper White Crinkle Seam Binding Ribbon (151326), Burlap Ribbon (141487)

As far as minor alterations, here are a few cards that I created by rearranging elements from the Paper Pumpkin kit. I had a fun time incorporating the bunny into my modifications.

Below is my stamps only card. I decided to take the card to the max and fulfill Stampin’ Up’s #simplestamping challenge: one piece of paper, no layers. I didn’t even use any embellishments. It’s my first completely compliant #simplestamping card. Using only one piece of paper and stamps is a challenge I haven’t risen to until now. The Stamparatus helped me perfectly line up these boots.

final

Stamps: No Matter the Weather & Spring Splash from March 2020 Paper Pumpkin kit

Paper: Thick Whisper White Cardstock (140272)

Ink: Basic Gray (149165), Gray Granite (147118), Poppy Parade (147050), Memento Tuxedo Black (132708)

Accessories: Stamparatus (146276)

I hope to have the privilege of running a Paper Pumpkin Workshop in person next month. I’m not counting on it though. You, however, can count on me to deliver lovely samples and alternate designs from next month’s Paper Pumpkin kit, My Wonderful Family. Subscribe by the 10th of April here.

04.01.20_PP_SHAREABLE

January PP Workshop Projects: I’ll Bee Yours

Card #1: Stamps Only

This card was made with the stamps from the kit, but not any other supplies. I think it’s my favorite. I’ve always had a thing for blue and yellow together. I used to have a yellow Kitchen Aid mixer in my blue kitchen. I had to upgrade to a larger size mixer though. Now I have a red one with a Wonder Woman decal on it. It’s pretty awesome. Enough about the contents of my kitchen….

I had the dumb luck of placing the small floral background stamp on my Stamparatus in such a way that I was able to take a 4 7/8″ square piece of paper and it lined up so perfectly that I could stamp on the white square, rotate the paper and stamp again until I completely covered the paper without any overlap or gaps. I’m not sure I could do it again, but it’s possible.

final

Supplies:
Stamps: I’ll Bee Yours Paper Pumpkin January 2020
Paper: Whisper White, Blueberry Bushel, Daffodil Delight, Noble Peacock DSP
Ink: Blueberry Bushel, Daffodil Delight
Other: Painted Labels dies, Stitched Rectangles Dies, Stampin’ Dimensionals, Heart Punch Pack*
*Side note: The Heart Punch Pack from the Heartfelt bundle in the January-June 2020 Mini Catalog coordinates perfectly with the heart stamp in this Paper Pumpkin.

Card 2: Sacrificial Lamb One

The only extra supply from this card that isn’t included in the kit is the Mint Macaron card base. Sacrificing one treat bag and one note card enabled me to make this full-size card.

final

Supplies:
I’ll Bee Yours Paper Pumpkin January 2020
Paper: Mint Macaron
Other: Stitched Shapes Framelets Dies, Layering Squares Framelets Dies, Wink of Stella, Stampin’ Dimensionals

Card #3: Sacrificial Lamb Two

Once again, the simple addition of a card base and some reworking of the kit’s contents yielded a full-size card. This card is basically the opposite of the one above. Instead of sacrificing one card and one envelope, this card requires two of the 3×3 card bases, but not any of the envelopes.

final-1


Supplies:
I’ll Bee Yours Paper Pumpkin January 2020
Paper: Heavyweight Whisper White
Other: Stitched Shapes Framelets Dies, Layering Squares Framelets Dies, Wink of Stella, Stampin’ Dimensionals

On My Mind: PP Workshop Recap

July’s Paper Pumpkin kit, On My Mind, was designed to coordinate with three suites from the Stampin’ Up Annual Catalog: Woven Threads, Garden Lane, and Come Sail Away. If I were going to buy one of these product suites, it would have been Come Sail Away. (I opted for Noble Peacock and Magnolia Lane instead.) Since I didn’t buy any of the coordinating stamp sets, I liked having the opportunity to work with the suites without buying them.

The kit included a Pretty Peacock ink spot and this stamp set and the supplies to make the cards pictured below it:

07.19_TOOLKIT_STAMPARTWORK

07.19_PP_FACEBOOK

Here are the cards we made at my workshop:

This card uses the supplies from the kit in an alternate way. One go-to method of getting more out of Paper Pumpkin kits is to cut open the envelopes and use the patterned lining as decorative paper, which is what I did with this card. The card contains elements of each product suite. The white card base is the only supply that was not included in the Paper Pumpkin kit.

final-8

I stamped this next card with the new silver Delicata ink that appears in the Holiday Catalog, which will go live on September 4th. Sometimes with metallic inks, I feel the need the to clear emboss them to give them  more dimension. I didn’t feel that with this ink. It has great shine and texture. As with most craft inks, the Delicata takes extra time to dry. However, it seemed not to take as long as other brands of ink I’ve used in the past and it was nice not to do the extra embossing. This card is a heavily influenced by a card by Bente Snow (whose website is currently under construction).

final-7

Supplies:
Cardstock: Smokey Slate (?), Petal Pink, Very Vanilla
Ink: Silver Delicata
Accessories: Petal Pink Organdy Striped Ribbon, Banner Triple Punch

In addition to making alternate versions of cards at my workshop, we made “spruced up” versions of the cards in the kit. The only extra supplies I used when designing these cards were various colors of cardstock. In the pictures below, the Stampin’ Up version of the card is on the left and my version is on the right.

Garden Lane cards:
I really try to keep track of where I get inspiration from so I can give credit where credit is due, but I can’t remember if this card was copied from someone else, or if it’s an amalgamation of ideas from several different cards. If it looks familiar, let me know who did it first so I can share their name. For this card, I used Mellow Moss cardstock.

final-10

Woven Threads:
Out of all the cards in this kit, this one was my least favorite. However, some ladies at the workshop who are also quilters  really loved it. I used Seaside Spray and Terra Cotta Tile cardstock on this one.

final-11

Sailing home:
I changed the orientation of this card from portrait to landscape. The only other element I added was the strip of Night of Navy Cardstock.

final-9

My next Paper Pumpkin workshop is at 7:00 pm on Friday, September 13th. You can here RSVP on meetup.com.


A Little Smile class recap

At my next Paper Pumpkin workshop, I’ll be featuring the July kit, On My Mind. You can register for it here on meetup.com. The workshop for the July kit is coming up fast, but in the meantime, I’ll share the projects we covered in my last class for the June kit, A Little Smile. First, here’s a quick rundown of the contents of the kit.

This is a picture of the stamp set.

06.19_TOOLKIT_STAMPARTWORK

The kit came with a Coastal Cabana ink spot and the supplies to make these cards.

06.19_PP_FACEBOOK

I don’t often hand out tiny cards, so I decided to incorporate the small cards in larger versions of themselves. Here are my cards:

Card #1

final-6

I mimicked the sea and sand background using the now retired Seaside embossing folder. I toned down the color of the paper by sponging it with white craft ink.

Supplies
Paper: Old Olive, Pool Party, Coastal Cabana, Crumb Cake
Ink: Coastal Cabana, white craft
Accessories: Frosted epoxy droplets, vellum, elements from kit
Techniques: Embossing, sponging

Card #2

final-5

I used the same embossing and sponging technique to make the side panel on this one.

Supplies
Paper: Coastal Cabana, Crumb Cake, Old Olive, Wood Textures DSP (retired)
Ink: Coastal Cabana, white craft
Accessories: Frosted epoxy droplets,  Petal Pink vellum from the Perennial Essence Vellum pack, elements from kit
Techniques: Embossing, sponging

Card #3

final-1

Matching this mini card had me stumped. I ultimately put some rubbing alcohol in a fine mist sprayer and spritzed some white paper with Pretty Peacock ink and gave it a wavy cut on one side. I sponged Crumb Cake paper with white craft ink. My daughter gave me the idea to color the starfish and vellum plant elements from the kit. I even colored the linen thread. I used Copic markers that sort of match the kit colors to color with. Stampin’ Blends would have matched the colors perfectly, but I don’t have any of those yet.

Supplies
Paper: Crumb Cake, Whisper White, Coastal Cabana
Ink: Coasal Cabana, Pretty Peacock
Accessories: Frosted epoxy droplets, Old Olive vellum from the Perennial Essence Vellum pack, elements from kit
Techniques: Spritzing, sponging

Card #4

final

I really liked the way the first layer on this card turned out. I created it using a foam roller with  Old Olive and Coastal Cabana ink.

Supplies
Paper: Whisper White, Heavyweight Whisper White
Ink: Coastal Cabana, Old Olive, Coastal Cabana
Accessories: Frosted epoxy droplets, vellum, elements from kit
Techniques: Foam rolling

Card #5

final-3

This is my “stamps only” card, a card to make when you’ve run out of supplies from your Paper Pumpkin kit. I CASEd this card from a card made by Stephanie Tsang. The punched used at the bottom is not from Stampin’ Up, it’s an old one from EK Success. It made me think of bubbles, which made me think of water.

Supplies
Paper: Heavyweight Whisper White, Whisper White, Seaside Spray, Soft Seafoam
Ink: Gray Granite, Seaside Spray, Soft Seafoam,
Accessories: Linen thread, silver Metallic Pearls, border punch

And now for even more cards, sans commentary….

final-2

Supplies
Paper: Heavyweight Whisper White
Ink: Pretty Peacock, Crumb cake
Accessories: elements from kit, ruffle ribbon from when Coastal Cabana was an In-Color
Technique: spritzing

final-4

Supplies
Paper: Heavyweight Whisper White, Crumb Cake, Melon Mambo Tropical Escape DSP
Ink: Crumb Cake, white craft
Accessories: Elements from kit, Flirty Flamingo epoxy dots